| Author |
 Topic Topic  |
|
Count Macula
USA
248 Posts |
 Posted - 08/10/2015 : 14:30:46 Posted - 08/10/2015 : 14:30:46


|
My dads birthday is next week and I wanted to give him something special, something personalized. But really couldn't think of anything good.
While at a yard sale with my wife on Saturday, there was a box of old tools. In the box was a bunch of old worn out files.
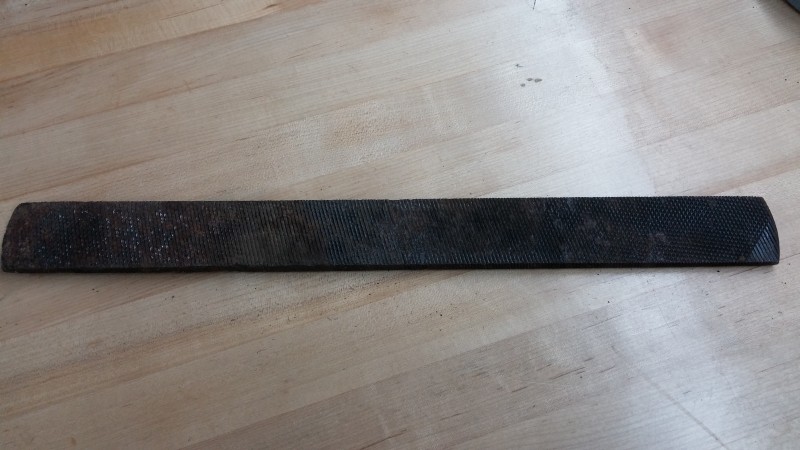
This totally gave me an idea of what to do... Im going to make him a knife. I watched a few youtube videos on it, I've always wanted to try it so I'll have a go at it.
After making a forge (I don't have pictures of what I rigged up but can take some if you are interested in seeing it, its really ghetto but work really well), I made the file soft again so that I could work the metal. I cleaned up the surface, drew out a shape and cut out two.
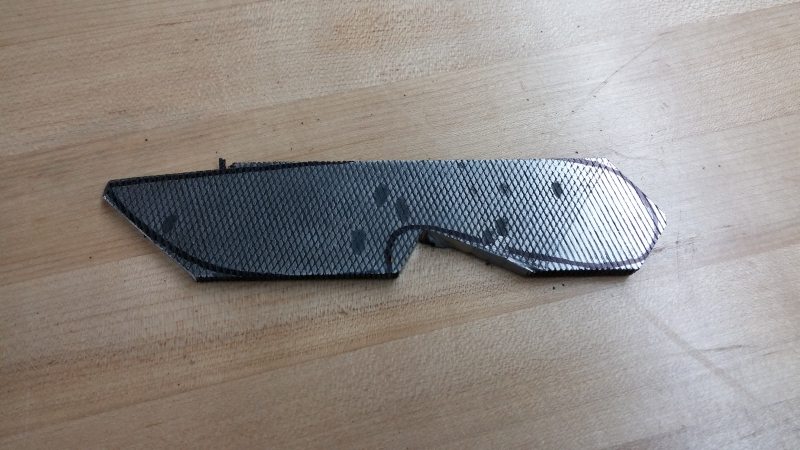
After getting it all cleaned up, I needed to grind a bevel. I tried this with a belt sander on a scrap piece of steel and failed miserably... Back to the house to figure out how to accomplish this seemingly impossible task.
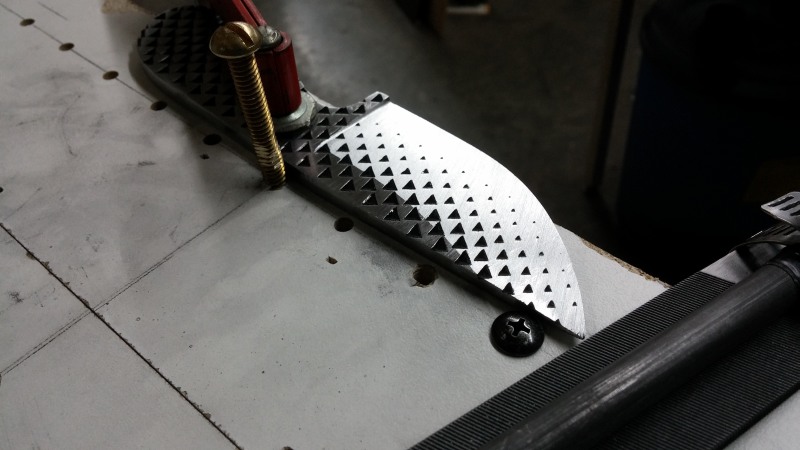
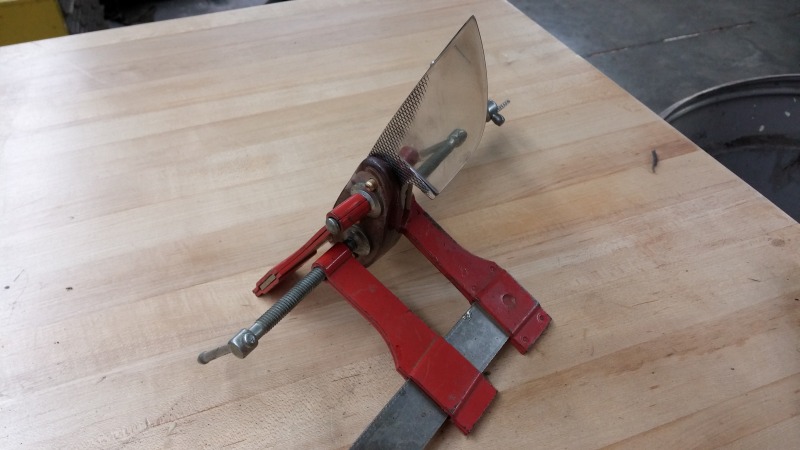
After a little research I found a guy that made a rig to file the bevels, so I made one...
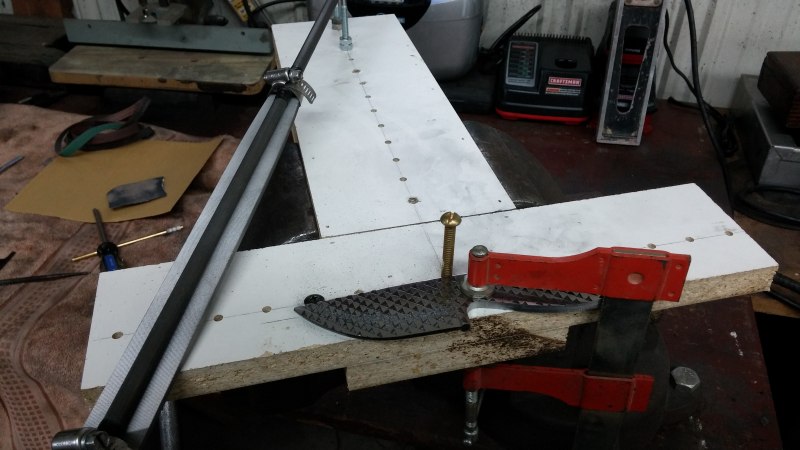
Here is the start of the grind.
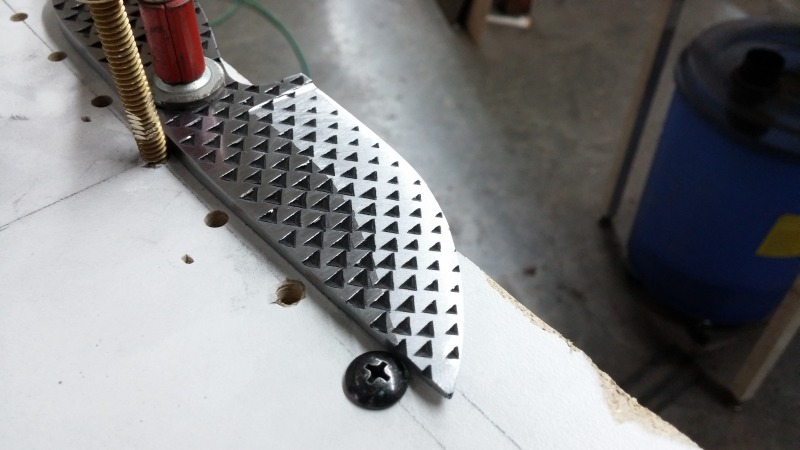
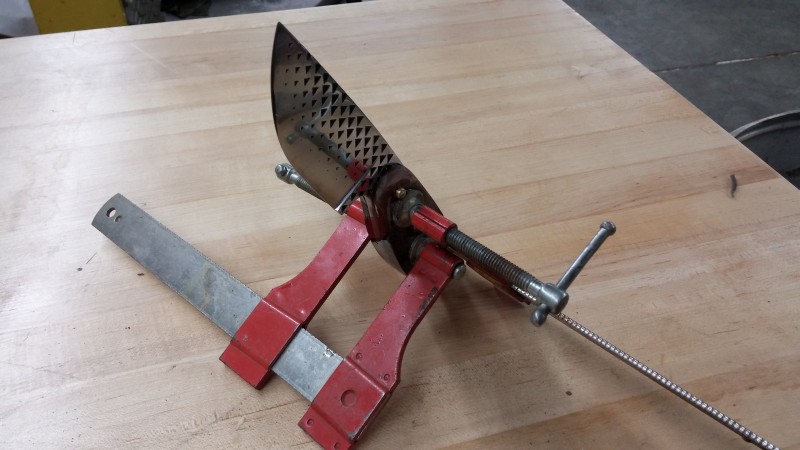
Half way through.
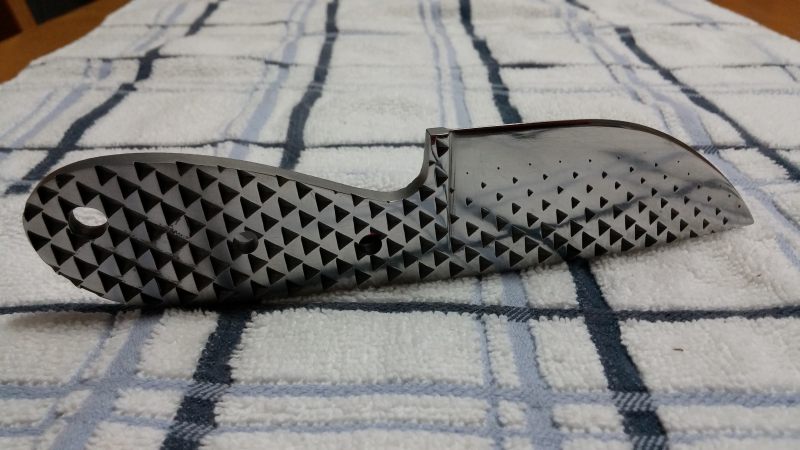
First side Done!
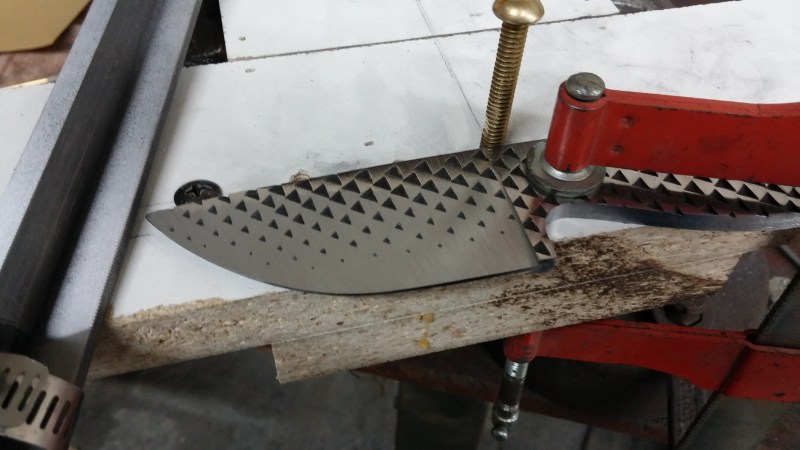
Another shot of the finished cut.

Flip side cut.
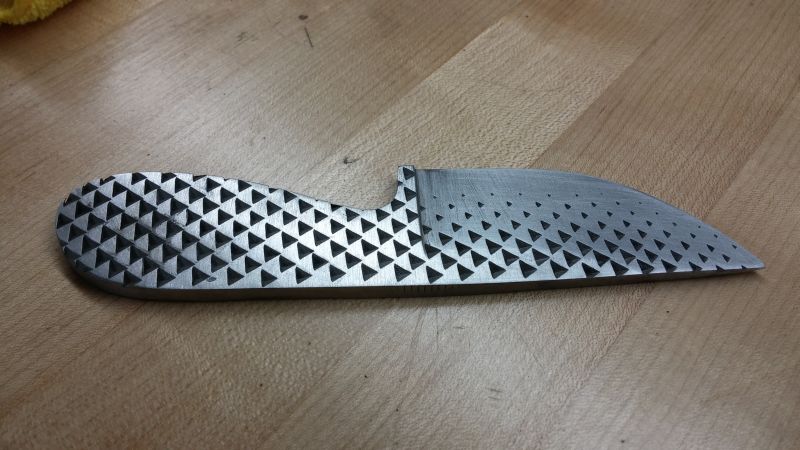
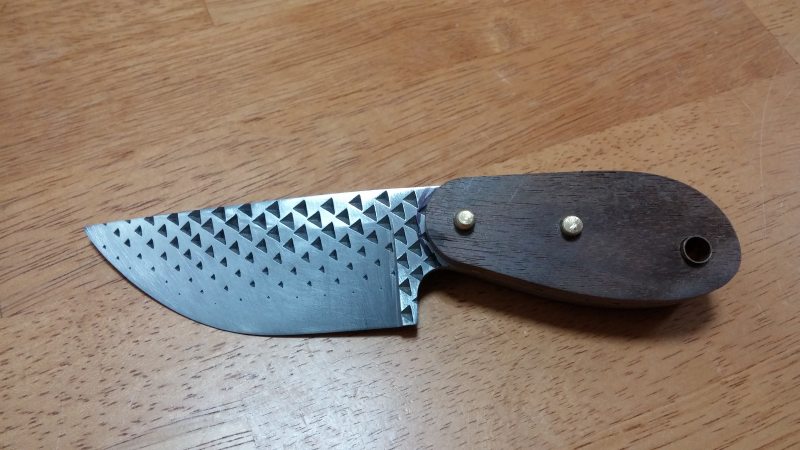
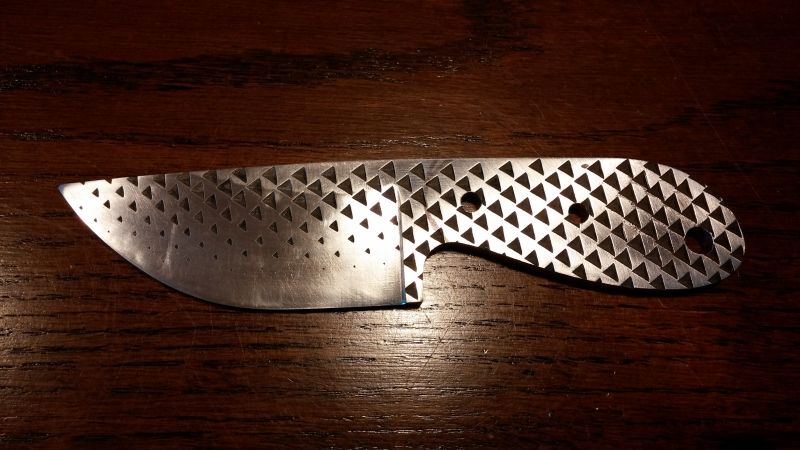
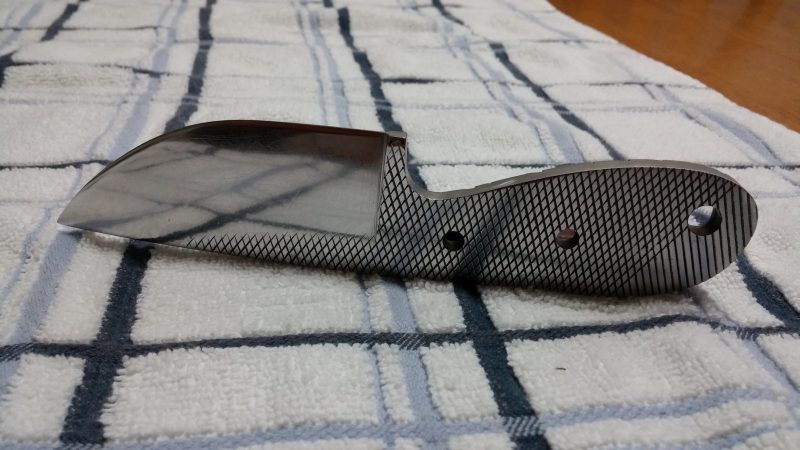
And where I stand at the moment.
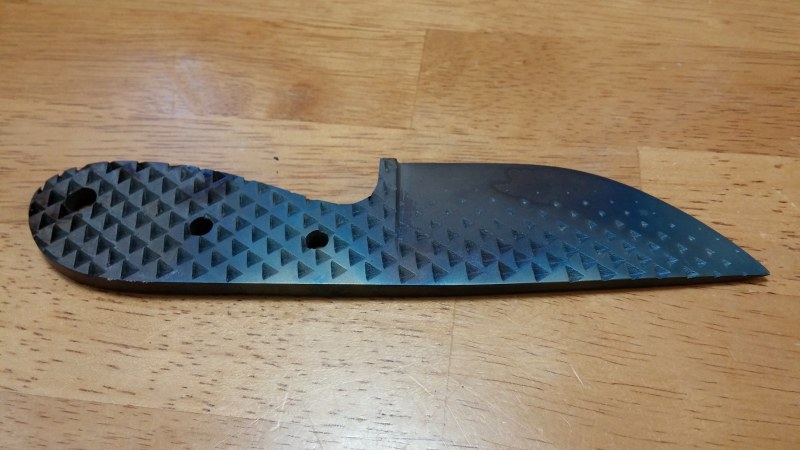
I really like how you can still see the texture of the file, I really hope he loves it, it's been a lot of work.
I might rework the handle it feels good in my hand but once I add the scales it might be too think. Tonight I'm going to drill the pin holes for the handle scales, sand down the file marks and if time allows fire the blade and harden it.
I'll post more pictures as I make more progress. I figured you guys would appreciate it. |
|
|
Cvans
USA
4427 Posts |
Posted - 08/10/2015 : 20:07:55
|
Interesting project. Going to be fun to watch how you do this.
|
East Central South Dakota
The democracy will cease to exist when you take away from those who are willing to work and give to those who would not.
Thomas Jefferson
|
 |
|
|
skunkhome
USA
12829 Posts |
Posted - 08/10/2015 : 20:29:40
|
| How long did it take to file each side? Looks tedious. |
  Phil
"They that can give up essential liberty to obtain a little temporary safety deserve neither safety nor liberty."
Benjamin Franklin |
|
|
|
Cvans
USA
4427 Posts |
Posted - 08/10/2015 : 22:39:42
|
| The more I look at the rasp side the better I like it. |
East Central South Dakota
The democracy will cease to exist when you take away from those who are willing to work and give to those who would not.
Thomas Jefferson
|
|
|
|
Count Macula
USA
248 Posts |
Posted - 08/11/2015 : 09:23:33
|
Phil if you have a good sharp file its not too bad, took about 45 minutes a side. It is tedious but I enjoy a challenge.
I like the rasp side too Chris! |
|
|
|
Count Macula
USA
248 Posts |
Posted - 08/11/2015 : 09:44:18
|
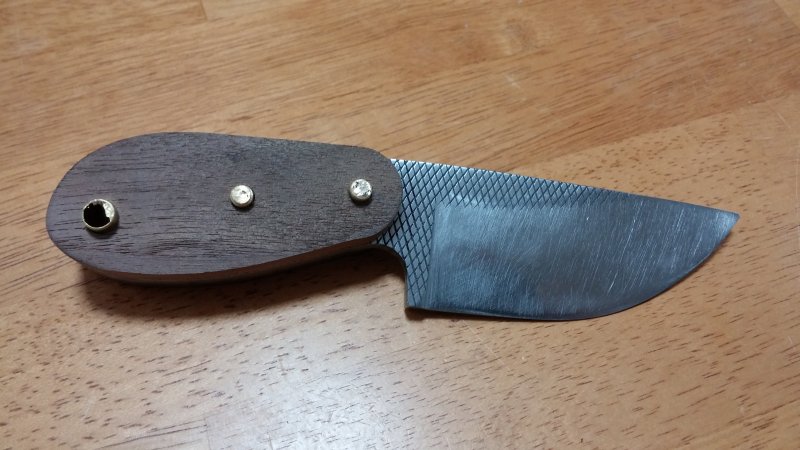
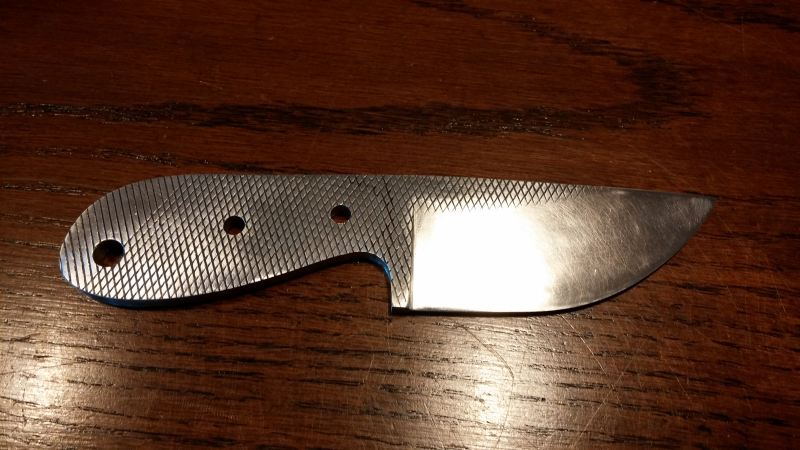
Wasn't able to get much done last night with the blade. I got the pin holes drilled and made some scales out of black walnut and test fit it all. Still need to remove more of the scratches before I harden it or it will be harder to remove the material.
Once I get it hardened and tempered I can epoxy the scales, grind down the pins and profile the handle.
I have a few concerns: I hope that I didn't bring the edge down too much that it might warp when I quench the blade and I have two pretty deep gouges from metal getting caught up under the file when I was cutting the bevel. I might need to clean it up after its hardened since Ill need to remove more edge material to get rid of them...
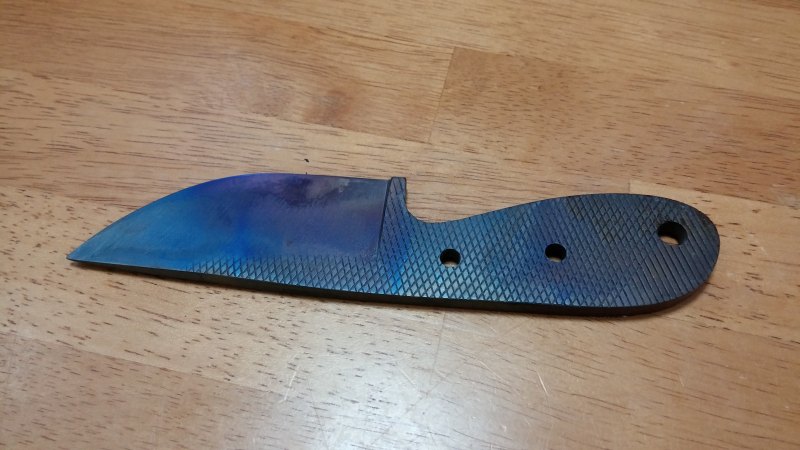
Im thinking the other knife Im making I will blue the steel and use beech scales for the handle, kind of like ying and yang blades.
 |
|
|
|
skunkhome
USA
12829 Posts |
Posted - 08/11/2015 : 16:17:03
|
| You've done this before. |
Phil
"They that can give up essential liberty to obtain a little temporary safety deserve neither safety nor liberty."
Benjamin Franklin |
|
|
|
B-16_IC
USA
2823 Posts |
Posted - 08/11/2015 : 21:09:17

|
| If he doesn't like it he's nuts! That is looking great! |
Life is all about paying. Pay attention, or pay the consequences, the choice is yours. Rich |
|
|
|
Count Macula
USA
248 Posts |
Posted - 08/12/2015 : 09:10:09
|
quote:
Originally posted by skunkhome
You've done this before.
First time I swear! But this might become a new hobby. |
|
|
|
Count Macula
USA
248 Posts |
Posted - 08/12/2015 : 09:50:42
|
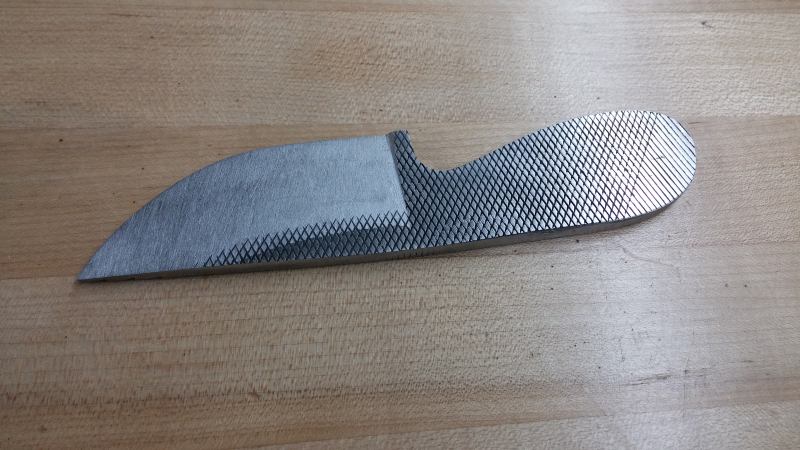
I took off the scales and sanded down the blade with 200 grit paper, in preparation of heat treating the knife last night.
After the sanding, I think when all is said and done this will mirror polish really nice.
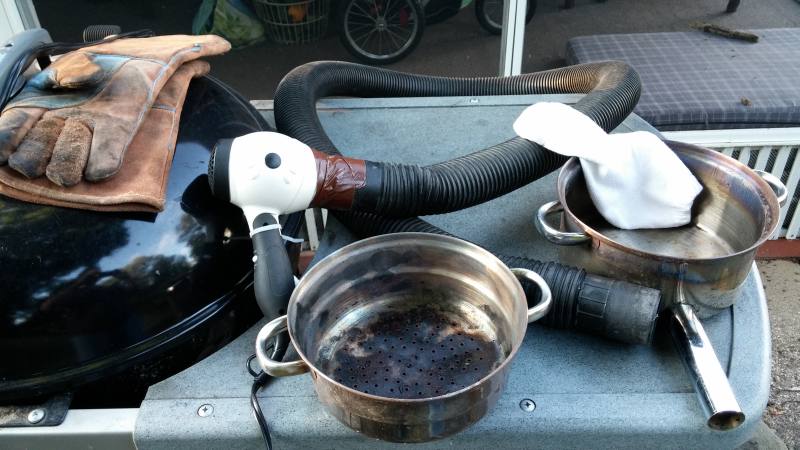
Well here it is my ghetto forge. A steaming pot, piece of drain tube, a hair dryer rigged to only blow cold air, a shop vac hose, an old sock, and scrap hardwood chunks.
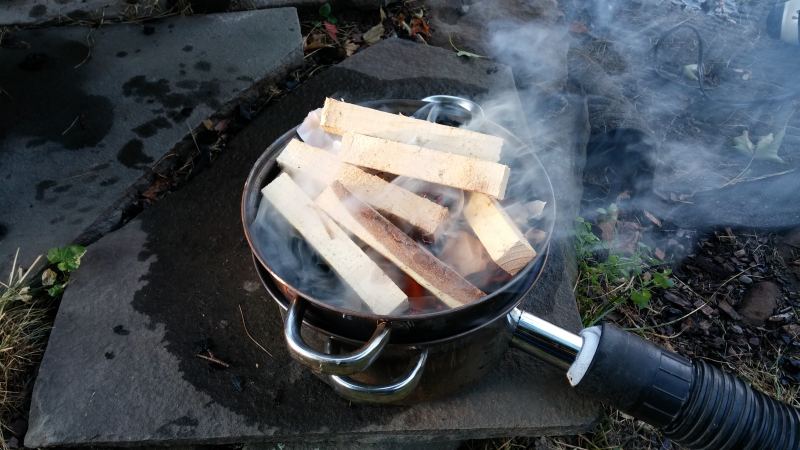
Start the fire.
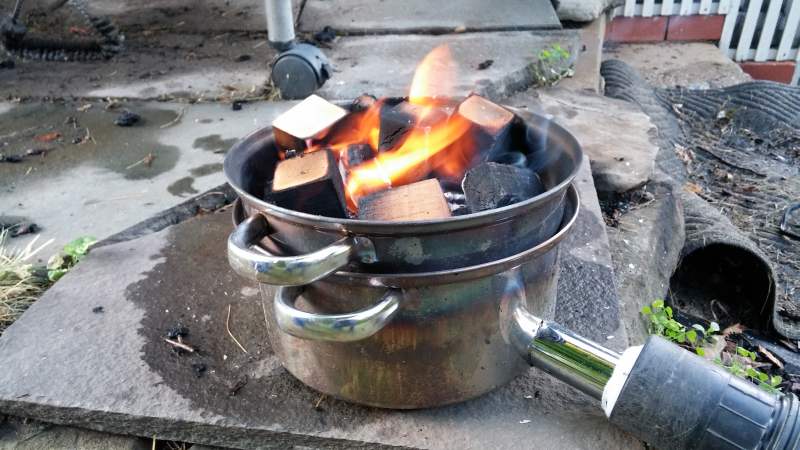
Now its going...
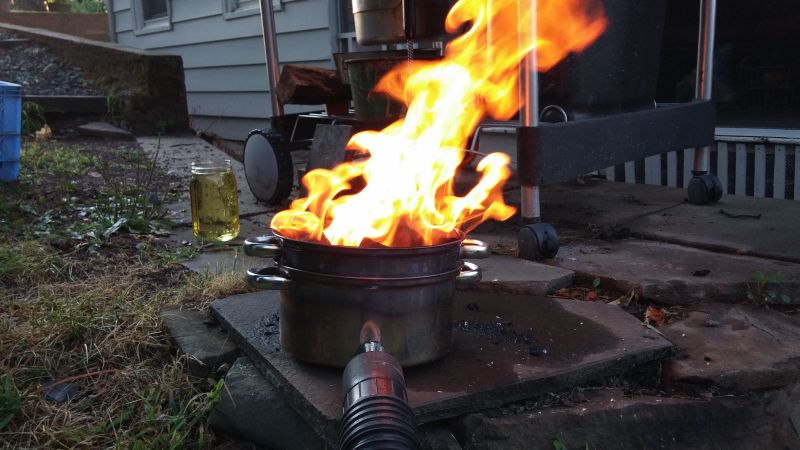
Lets turn on the hair dryer, add some air!
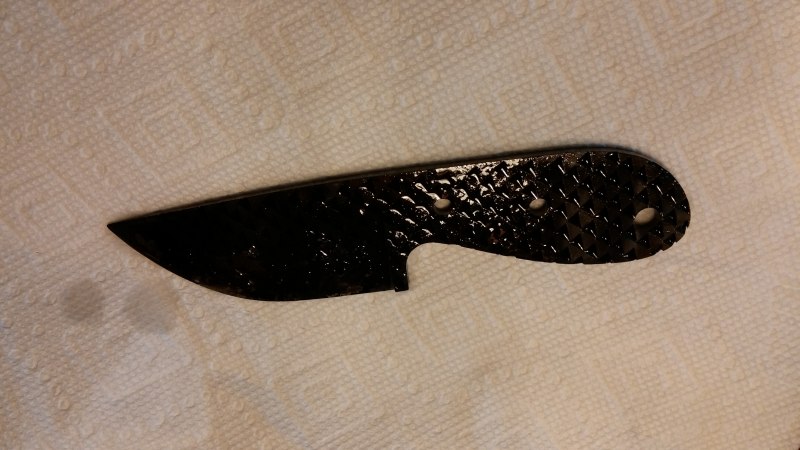
Here is the blade after the quench in oil, sorry I have no pictures the blade in the forge but as Im sure you can imagine there is a lot going on at that time.
Success, the edge didn't warp! I was really concerned about that. Now I will bead blast the blade then I put it in the oven at 400 degrees for 1 hour and let it cool in the oven.
I was reading that you can and should temper the spine of a knife by running the spine over your range or a torch until the steel blues. this allows the spine to be softer then the edge but allows the edge to retain its hardness. Probably not needed for a blade this size but I can see if you were making a chopper how it would be a benefit to have a softer spine to take the concussive striking and not shatter.
Tonight I will mirror polish the surface and epoxy the scales. |
|
|
|
Cvans
USA
4427 Posts |
Posted - 08/12/2015 : 17:52:13
|
Coming along nicely and thanks for letting us watch the progress.
|
East Central South Dakota
The democracy will cease to exist when you take away from those who are willing to work and give to those who would not.
Thomas Jefferson
|
|
|
|
olcowhand
USA
5115 Posts |
Posted - 08/12/2015 : 20:16:40
|
| Pretty cool! I don't have the patience these days to tackle something like that. |
Daniel in Ky -- So much to do, so little time!

|
|
|
|
skunkhome
USA
12829 Posts |
Posted - 08/12/2015 : 22:18:23
|
| I'd love to try that. Looks like a good winter project. I guess I would need a much larger jig with a longer radius if I were making kitchen cutlery. |
Phil
"They that can give up essential liberty to obtain a little temporary safety deserve neither safety nor liberty."
Benjamin Franklin |
Edited by - skunkhome on 08/12/2015 22:19:58 |
|
|
|
Count Macula
USA
248 Posts |
Posted - 08/13/2015 : 14:54:11
|
My pleasure Chris!
Daniel, you can totally do this.
Phil, you should try it. If your plan is to do kitchen cutlery, you shouldn't be using steel over 12 gauge so you wouldn't need to cut a bevel. Even so, you could use the rig I have made. I'm using a 12 inch file, you could do probably a 12-14 blade with what I built.
I would say though, start with something easy. My first blade I made before I started with this project I made from a broken saw blade. I did it in one night (it looks like I did) its ugly but its my new garden knife. hahaha But, seriously I did learn a lot from it.

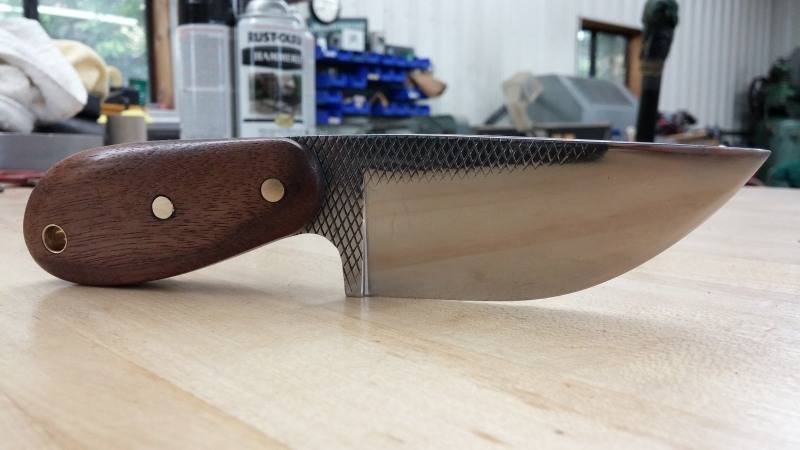
So, last night I polished the blade. I got tired of hand sanding then remembered I had a 3M headlight restoration kit. Score!
There are still a few marks on it, its not perfect but still pretty good.
After the polish I epoxied the scales and clamped it down. I should have it done tonight!
 |
|
|
|
Count Macula
USA
248 Posts |
Posted - 08/13/2015 : 19:25:36
|
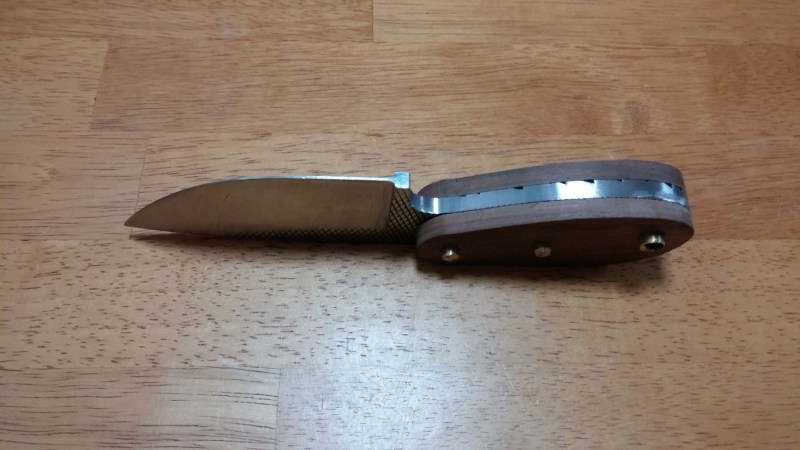
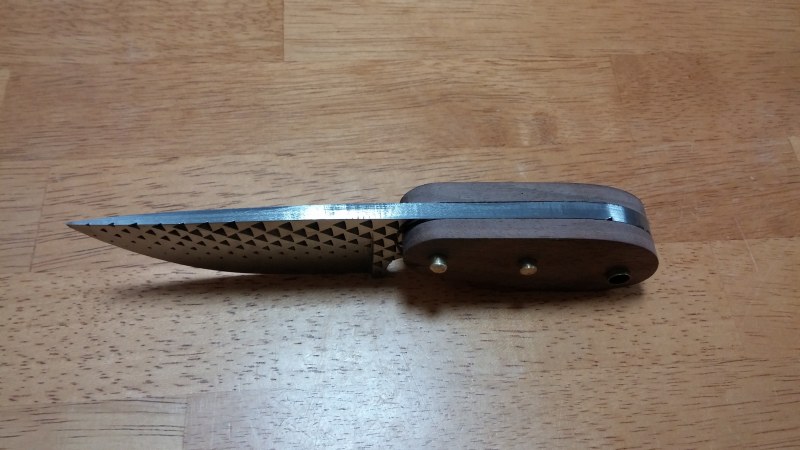
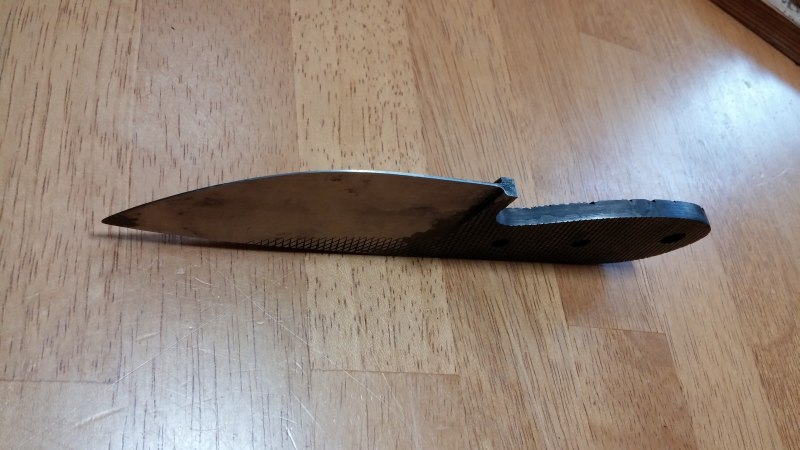
Came home excited because I knew it was going to be finished tonight.
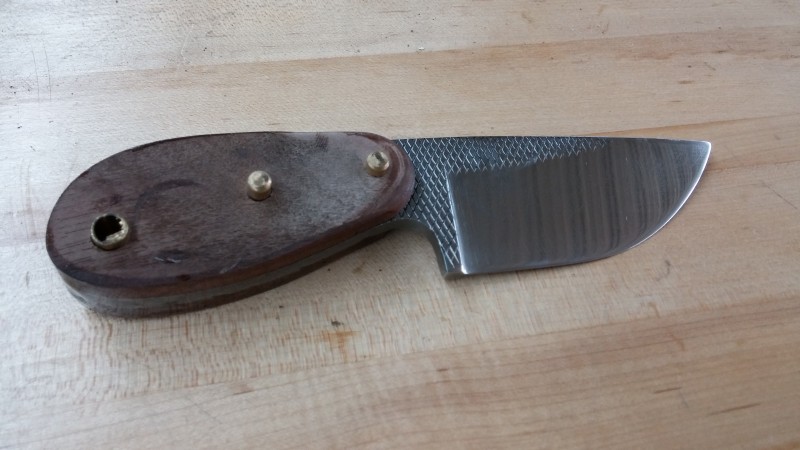
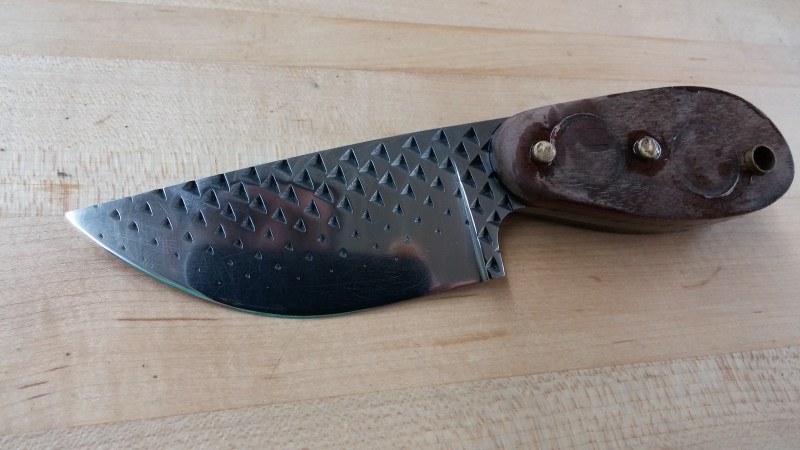
scales all glued on, need to grind the pins and shape the handle.

Here she is, handle is shaped and oiled. I just need to put an edge on it now, maybe Ill make him a sheath and that's it. It was a lot of work but it was also a lot of fun. Thanks for watching my progress. I encourage you to try it too, any of you guys or gals on here can do it. |
|
|
|
Cvans
USA
4427 Posts |
Posted - 08/13/2015 : 20:33:38
|
That knife turned out just awesome!!! I didn't think I was going to like the handle but it turned out very nice. The angle and shape is perfect.
|
East Central South Dakota
The democracy will cease to exist when you take away from those who are willing to work and give to those who would not.
Thomas Jefferson
|
|
|
|
Topic |
|
")
